The key steps include picking the right location marking the area, and leveling the ground evenly. Even if the ground is sloped, you can fix it by digging down higher areas or adding gravel and blocks to raise lower spots.
By following the process outlined in this guide you’ll have a shed that looks great works perfectly, and stands the test of time.
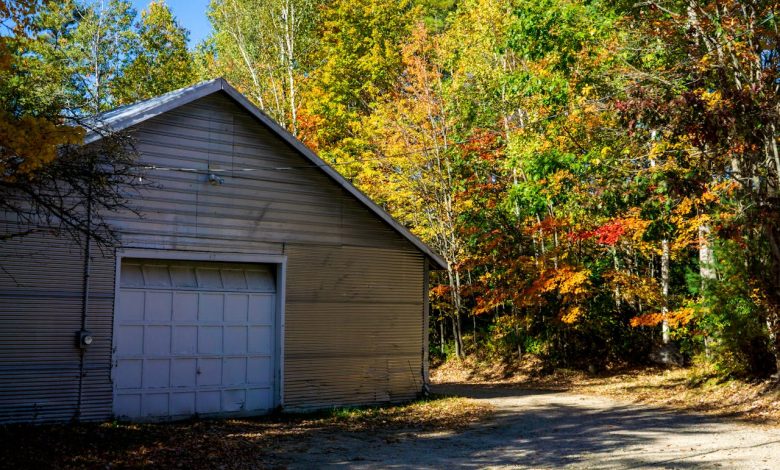
Step 1: Choosing the Right Location for Your Shed
Before learning the steps for how to level a storage shed the first and most important task is selecting the perfect location. The spot you choose can greatly impact the stability and durability of your shed.
Tips for Picking the Best Location
- Check Local Regulations
Before you start make sure to check zoning laws or permits required in your area. Some places have rules about where you can place a shed which may affect how you level your shed base. - Avoid Problematic Areas
Stay away from swampy soft ground, or steep slopes. Uneven terrain can make shed leveling harder and cause long-term issues like sinking or tilting. - Watch for Underground Hazards
Check for buried pipes, cables or tree roots. These can interfere with how to level ground for a storage shed and may lead to future problems. - Consider Accessibility
Make sure your shed is easy to access. Whether you’re storing tools or equipment having a clear path to your shed is crucial. - Think About Sun and Aesthetics
Place your shed where it gets enough sunlight to prevent moisture buildup. Also, consider how it looks in your yard to keep everything visually appealing.
Mastering Oak Framed Construction: From Timber to Tranquil Retreats
Step 2: Preparing the Ground for Shed Leveling
Once you’ve chosen the perfect spot for your shed, the next step is to prepare the ground for leveling. A well-prepared foundation ensures that your shed remains stable, even during harsh weather or heavy use.
Clear the Area
Start by removing any debris, rocks, grass, or roots from the area. Use a rake and shovel to clear the ground thoroughly. This step is essential to create a smooth surface for how to level a storage shed.
Mark the Shed’s Boundaries
Use stakes and string to outline the exact dimensions of your shed. This helps you visualize the area and ensures accuracy during shed leveling. Make sure the lines are tight and straight so you have a clear guide.
Check the Slope
Assess the natural slope of the ground using a long level or string line. If the slope is minor, you can adjust it during leveling by digging down or building up with storage shed leveling blocks. For steeper slopes, you may need additional gravel or soil to fill in low spots.
Gather Your Tools
To make how to level a shed base easier, ensure you have the following tools ready:
-
- A shovel for digging and filling
- A rake for smoothing the ground
- A long level or string line to check for flatness
- Leveling blocks for sheds or gravel for adjustments
Step 3: Squaring and Staking the Shed Site
Before you start leveling the ground it’s important to square and stake the site. This ensures that your shed will sit evenly and that the foundation is aligned properly. A square and precise outline is key to successfully completing how to level a storage shed.
Gather Your Tools
For this step, you’ll need:
- Stakes or wooden pegs
- A hammer or mallet to drive the stakes into the ground
- String or twine to connect the stakes
- A measuring tape for accuracy
- A carpenter’s square to check the corners
Place the First Two Stakes
Start by driving the first stake into the ground where one corner of your shed will be. From there, measure the length of one side of the shed and place the second stake at the opposite corner. Use a string to connect these two points.
Establish the Other Corners
Repeat the process for the other sides of the shed, creating a full rectangle or square. Ensure the measurements match the dimensions of your shed.
Check for Squareness
Use a carpenter’s square or measure diagonally across the corners to confirm that the outline is perfectly square. Both diagonal measurements should be equal. If they’re not adjust the stakes and strings until the dimensions align.
Mark the Ground
Once everything is squared, mark the boundaries by sprinkling chalk or using spray paint along the string lines. This will guide you as you prepare the ground for shed leveling.
Squaring and staking your site ensures your foundation is precise and ready for leveling. In the next step, we’ll focus on the actual process of leveling the ground and using storage shed leveling blocks to achieve a stable base.
The Most Recent Information On Garden Rooms
Step 4: Leveling the Ground for Your Shed
With your site squared and staked, it’s time to tackle the most important part of the process: leveling the ground for your storage shed. A properly leveled foundation ensures your shed stays sturdy and doesn’t develop structural issues over time.
Identify High and Low Areas
Start by assessing the surface. Use a long level or a string line stretched across the staked area to determine which parts of the ground are higher or lower. This step is crucial for figuring out how to level a shed base accurately.
Dig High Areas
Use a shovel to dig down the high spots and create a more even surface. Remove just enough soil to match the level of the lower areas. Be sure to double-check your progress using the level as you work.
Fill Low Areas
For areas that are too low, add soil or gravel to bring them up to the desired height. Compact the material using a tamper or heavy board to create a firm base. If needed place leveling blocks for sheds in these spots for extra stability.
Smooth and Check the Surface
After adjusting the high and low points rake the area to smooth out the surface. Check the entire foundation with a long level or string line to ensure it’s flat and even. This is a key step in mastering how to level ground for a storage shed.
Prepare for the Foundation
Once the ground is leveled, you’re ready to add a strong foundation. Gravel is an excellent choice for drainage and it pairs perfectly with storage shed leveling blocks to create a secure base. Spread a layer of gravel evenly across the site and tamp it down for stability.
Step 5: Adding and Finalizing the Shed Foundation
Now that the ground is level, it’s time to set up a strong foundation to support your shed. A proper foundation not only ensures stability but also prevents long-term issues like sagging or water damage. Follow these steps to complete the foundation for your storage shed.
Lay Down a Gravel Base
Start by spreading a layer of gravel across the leveled area. Gravel helps with drainage and provides a firm base for your shed. Use a rake to distribute the gravel evenly and ensure it’s about 3–4 inches deep. Compact the gravel with a tamper or plate compactor to make it solid and stable.
Use Leveling Blocks for Sheds
If the ground is uneven or slightly sloped place storage shed leveling blocks in strategic spots under the shed’s corners and support beams. These blocks help adjust the height and provide a balanced foundation. Make sure each block is securely positioned on the gravel base.
Double Check the Level
Use a long level to check that all blocks and gravel are even. Adjust the height of the leveling blocks if needed by adding or removing gravel underneath them. Ensuring everything is perfectly level is crucial for a solid shed base.
Secure the Foundation
Once the gravel and blocks are in place, secure them by tamping down the area around each block. This helps lock everything in place, reducing the chances of shifting over time.
Prepare for Shed Installation
With the foundation complete, your site is now ready for the shed installation. Whether you’re building from a kit or assembling your own design, this stable base will make the process much smoother.
Step 6: Maintenance Tips for a Long-Lasting Level Shed
Now that your shed is perfectly leveled and installed, it’s important to maintain it over time. Proper upkeep ensures that your shed remains stable, functional and free from damage caused by shifting or uneven ground. Follow these tips to keep your shed in great condition.
Inspect Your Shed Regularly
Periodically check your shed for any signs of shifting or tilting. Look for uneven doors, sagging floors or cracks in the foundation. Catching these issues early can save you from more significant repairs down the line.
Adjust Leveling Blocks as Needed
If you’ve used storage shed leveling blocks inspect them occasionally to ensure they haven’t moved. Over time soil can settle especially after heavy rains or seasonal changes. Adjust the blocks by adding or removing gravel underneath them to maintain a level shed.
Prevent Water Damage
Water pooling around your shed can cause the ground to erode, leading to uneven surfaces. Use a gravel or stone border around your shed to improve drainage and keep water away from the foundation. This is especially important if you’ve used leveling blocks for sheds.
Keep the Area Around Your Shed Clear
Ensure that no roots, debris, or plants are growing too close to your shed. These can interfere with your foundation and affect how to level a storage shed in the long run. Clearing the area also helps with drainage and improves air circulation.
Re Level When Necessary
Even with the best setup, your shed might need re-leveling after several years. If you notice any unevenness, revisit the leveling process: check the base, adjust the blocks, and compact any loose gravel or soil. This will keep your shed in top shape.
Luxury Home Builder: Crafting Custom Homes with Sophistication and Style
Conclusion
Learning how to level a storage shed is a rewarding project that ensures your shed is not only functional but also long-lasting. By following the steps outlined in this guide choosing the right location preparing the ground squaring and staking the site leveling with care and adding a solid foundation you’ve set yourself up for success.
Using tools like leveling blocks for sheds and a gravel base, you can create a stable foundation that prevents future issues like tilting or sinking. Regular maintenance will keep your shed level and in great shape for years to come.
Whether you’re storing tools, equipment or seasonal items a properly leveled shed protects your belongings and enhances the look of your yard. With the knowledge and tips you’ve gained here you’re ready to tackle your shed leveling project with confidence.
FAQs
What is the easiest way to level a shed?
The easiest way to level a shed is by using storage shed leveling blocks. These blocks can be placed under the shed’s corners or support beams to adjust the height and create a stable foundation. Pair them with a gravel base for added support and drainage.
Does a shed have to be perfectly level?
Yes, a shed should be as level as possible. An uneven shed can lead to structural issues, doors that don’t close properly, and increased wear on the frame. A properly leveled shed ensures longevity and functionality.
How do you fix an uneven shed?
To fix an uneven shed identify the low areas and use leveling blocks for sheds to raise the shed. You may need to dig under high spots or add gravel to create a stable and even base. Regularly check the level to ensure the adjustments are accurate.
What is the cheapest flooring option for a shed?
Gravel is one of the cheapest flooring options for a shed. It’s affordable, easy to install and provides excellent drainage. If you prefer a smoother surface plywood is another budget-friendly choice that can be placed on top of a gravel base.